
Prunus mume propagation via cutting in May-June
Prunus mume propagation season is fast approaching here in Montreal, Canada, which means it will arrive even sooner for many of you reading this.
The common name for Prunus mume is flowering apricot. In China, where it originated, it is called méi (梅), while in Japan it is called ume (梅, or ウメ).
The latter is, of course, the term most of us in the West have become accustomed to using because our acquaintance with the species through Japanese bonsai.

When it comes to propagating Prunus mume, the internet seems to be full of suggestions with people often sharing—or even promoting—methods with unacceptably low success rates. It is especially unfortunate that hardwood cuttings (taken during winter dormancy) have received a totally unjustified—and often misleading—amount of attention, since there is no scenario in which hardwood cuttings produce greater results than cuttings taken in May-June. (This includes relatively recent publications in bonsai journals/magazines, revealing where a peer-review process is lacking).
The process described below has consistently yielded success rates above 90% for a great number of genetic strains including documented cultivars.

TIMING
Here in Montreal, cuttings are taken from May 15 to June 30. Finding the optimal moment requires some practice:
The 'snap test' used with Acer palmatum (see previous blog post HERE) does not work well with Prunus mume as its wood tends to pass the test prematurely.
We often read 'when leaves harden' in bonsai, but I don’t find that to be a reliable guide either.

As someone who propagates a large volume of Acer palmatum, a lot of my processes are built around this period and use it as a reference point. But even if you are not propagating Japanese maples, I recommend using them as a reference: once most of your Japanese maples are passing the ‘snap test’, wait 3–4 weeks and begin taking Prunus mume cuttings. Don't have any Japanese Maples? We can't be friends.
As a general reference, the second and third weeks of June are a good starting point for most of North America (excluding the hottest regions) - a moment when you should see some success whether you're in Oregon, Quebec City, or Tennessee.
If your parent plant produces a large volume of material, take cuttings weekly over 2-3 weeks to help identify the ideal window. (This works best if you can take at least 10–15 cuttings per week)
SIZE MATTERS
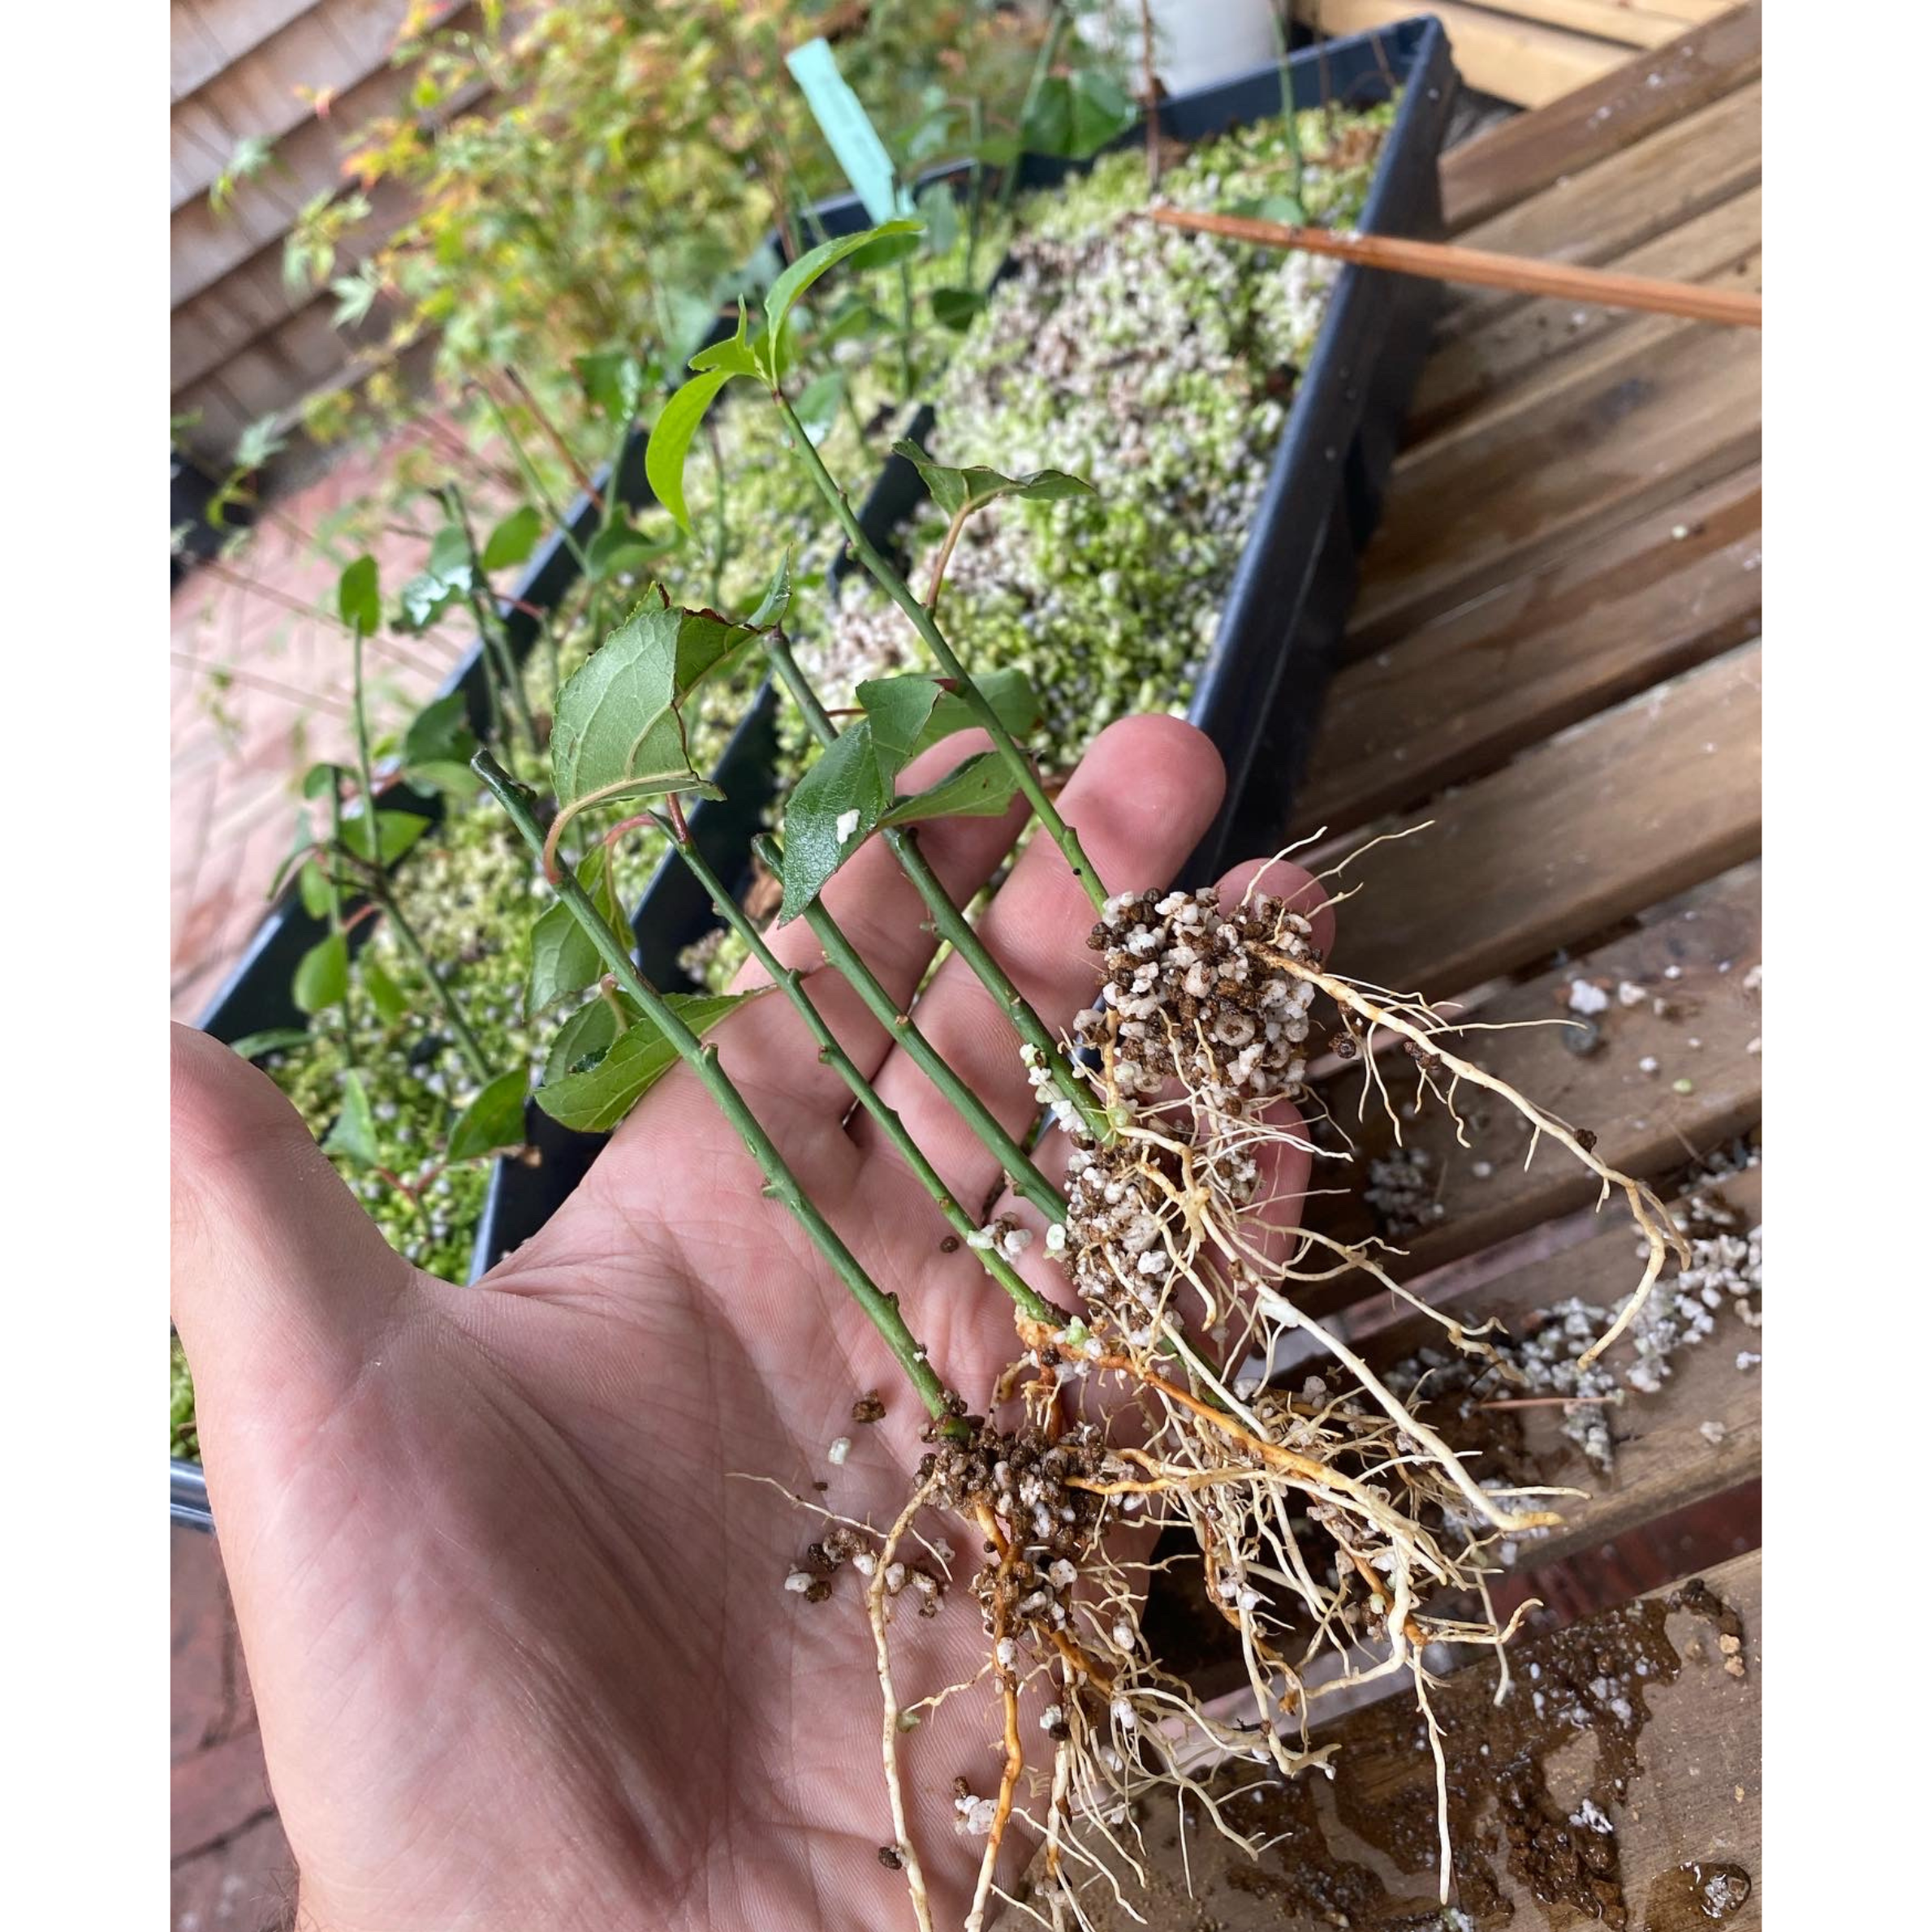
I take cuttings approximately 4 inches long.
On very strong shoots with long internodes, this may mean only one bud on the cutting. On weaker shoots with shorter internodes, it could mean eight or more buds on the cutting. At least one bud is required.
I generally leave two leaves per cutting, and cut each leaf in half. When the leaves are especially large, I leave only one leaf, and I cut that one leaf in half.

I seal the tips with cut paste. Yes, I know you can succeed without doing this—I do it because it helps me sleep at night.

A 2017 publication demonstrated noteworthy success rates using 'mini cutings'. I thought it would be important to share this since the majority of people are working with a limited supply of cutting-material.

Here is a picture from their article:

Pro Tip: The length of the cutting, leaf count, bud count, and leaf reduction are all variables you can adjust depending on the cultivar.
For example, with some cultivars I leave 6-10 leaves per cutting.
I will also say that the thickness of the cutting, and whether you use the base or tip of a shoot, are both important things to track if you’re the note-taking type.


HORMONE
There are many options available. I’ve tried gels, powders, and pastes, but in recent years I’ve favoured liquid hormone.
I water the trees in mid-afternoon, take cuttings after sundown, and place them in a jar with rooting hormone overnight.
Dosage: I have gone back-and-forth regarding a one size fits all solution (😉). Start with the recommend dosage available online, and work from there. Don't have time for testing? Use powder hormone as you would for Acer palmatum.
In the morning, I refresh the cut with a grafting knife and insert the cutting into the substrate.

SUBSTRATE
I have had equal success with a number of substrates, and continue to test new ones every year. Nowadays, I most often use:
3 parts perlite
1 part coco fibre husk
0.5 part kanuma
Other options that have worked fine for me:
100% akadama
100% perlite
50-50 perlite and seed starter mix from hardware store.
The substrate particle size should be fine, but not dust.
Pre-water your substrate before inserting your cuttings. This is especially important if you’re using powder or gel hormone, since an initial watering will wash-away some unknown amount of your hormone.
Do not force cuttings into the substrate. Pre-making holes (a chopstick works well) is time-consuming but worth it.

HEAT, HUMIDITY, AND THAT KIND OF STUFF
Bottom heat: 26°C (80°F) using a heat mat
Water: none for the first 2 weeks, then as needed (the humidifier alone might be enough for the first 6 weeks)
Humidity: cool-mist fogger
Continuous from sunrise to sunset
Intermittent overnight (15 minutes every 1.5 hours)
Airflow: provided by transportable AC unit
Air temperature: 18°C (64°F), or as low as your transportable AC unit allows
Covering: 6 mm polyethylene (≈95% light transmission, diffused)
Shade cloth: 40% (full-day exposure otherwise)
A lot of this can be found in the Recommended Products section of the website, HERE.
Is all of this necessary? No.
In Halifax, I used a much simpler setup: heat mat, plastic humidity cover, a $14 humidifier, and some LED lights (I think the lights were likely unnecessary).

It can be simpler still. I’ve had success sticking cuttings directly into a garden bed. No heat mat, no humidity control—just nature. Success rates will be lower, but if the material would otherwise be discarded, give it a shot in a shady/damp location shielded from wind.
EXPECTATIONS
Some will die, but that’s the game we play

Once rooted, I pull them out carefully:

Plant them into nursery mix:
33% gravel (silica)
33% perlite
33% Coco Husk
+ Bio-Rock (McInnes)
You don't need to use this mix, but use something that drains well and allows for good air exchange.
Akadama fines are not the best solution here.

Into individual pots:

Same year growth usually results in 1-2 shoots, with anywhere from 1 to 15 internodes per shoot.

Same year growth can potentially look like this, but I would not set expectation this high since skill and genetics play important roles:

SIDE NOTE ON REPOTTING
Over multiple years and across many genetic strains, I compared two batches: one repotted immediately after rooting (~July), and the other repotted the following March.
The following year, both batches showed identical growth and momentum. When uprooted in July (~12 months post-rooting), the root systems from both batches showed no observable differences.
Conclusion: repotting immediately after rooting (~July) or after winter (~March) ceteris paribus makes no meaningful difference. Exception: in the case of extremely 'weak' or 'slow' cultivars waiting to repot in March does help.

Depending on your skill and the genetic strain that you’re working with, one-year-old cuttings may already be strong enough to take cuttings from! There are at least 4 nice cuttings on this one:

On the topic of genetic strains, it’s important to repeat:
If a strain performs well with hardwood cuttings (winter), it will perform equally well—or better—with cuttings taken in May–June.
I am currently working with over 100 genetic strains and have not observed any exception to this.
Despite their sometimes fervent admiration for hardwood cuttings no individual has accepted my invitation to present any evidence to the contrary (see conversations scattered throughout the world wide web).

SUCCESS RATES
The majority of the strains I’m working with are documented cultivars. However, at this time there is no use for me to list out success rates for each cultivar since the majority of people are currently working with whatever they happen to have.
I will say that it is simply not true that ‘yabai’, ‘hibai’ or ‘plain, non-cultivars’ always root better than documented cultivars -- use what you have, you might get lucky!
A FINAL NOTE
Despite the fact that this very blog explains how to take cuttings of Prunus mume, the goal is multiplication of units, strictly speaking. I want to emphasize that having cultivars on their own roots is absolutely not the goal here. It’s very important that we do not import our ideas about garden-centre style grafted Japanese maples into our understanding of Prunus mume.
Not only is there no inherent advantage to growing ornamental cultivars on their own roots, it can be a disadvantage from the perspective of long-term development.
I’ll say more about this in a future blog post, but in a preliminary way I want to point out—as Andrew Robson from Rakuyo Bonsai has also noted in a Youtube video HERE—that Prunus mume is a species that will almost always require grafting work throughout its life as a bonsai. This is relevant because grafting can occur at various stages of a bonsai’s development, and each of these moments is an opportunity to alter the genetic strain of the tree (at various physical points in the tree's structure) whether the purpose is to change the flower type, leaf type, branch patterning, etc. without any negative consequence on aesthetics -- quite the contrary!
